Is NetworkedBlogs Reducing Your Page Views and Your Link Juice?

You spend so much time maintaining your blog, creating solid content, finding pictures, optimizing SEO, and managing your social media outlets, so when you find a time saver you want to take advantage of it. And I am all for time savers. Unless those time savers hurt your blog.

Many bloggers use NetworkedBlogs to automatically send their posts to their Facebook page. It is easy to use and appears to be a time saver, but in reality it is reducing the page views you receive from Facebook. How come? Networkedblogs opens the link to your post in an iframe if your reader clicks on the image or post title (they include a link to the full article at the bottom of the status, but most people don’t know to click there). So your followers are not actually clicking through to your blog to read the post, they are reading it on a NetworkedBlogs iframe. NetworkedBlogs is getting page views for your posts read by your followers.

Instead of getting link juice from NetworkedBlogs, you are losing page views.

How do you know that you are on a NetworkedBlogs iframe instead of the actual blog you thought you were visiting?

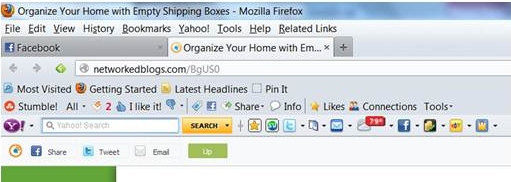
1. Look at the URL. Notice in the above image that the URL includes www.networkedblogs.com

2. Look at the flavicon. That is NetworkedBlogs’ flavicon, not the blog’s flavicon.

3. Look at the grey tool bar that is installed right above the post. If you click on those share buttons, you will share a link back to NetworkedBlogs iframe, not to the actual blog post. Which means that when your readers click on one of those social icons Networkedblogs receives your link juice in addition to your page views.

How to Share Your Posts to Facebook Without Using a Third Party Application:

After you publish your post, use the social share buttons at the bottom of your post to share your post to your Facebook Page.

I use the ShareThis plugin on my blog posts and can easily share to a variety of social media at one time. You can also customize what you say about the post and tailor it for the different platform audiences. The words you use and the picture you pick to go with the a link greatly affect how many people click through to read your article.

What if you publish your post in the middle of the night and don’t want to share it then? I have two posts that go live at 1:00 am when I am asleep.  I share the link on my social media accounts when I wake up in the morning. However, if you really need to you can schedule a post on Facebook.

Have you found any beneficial time savers?
How to Link to Social Media Accounts In Posts

There are times when you will want to link to a Facebook status, a tweet or a Pinterest pin in your post. Linking directly to the status has the advantage of bringing your readers up to speed on a conversation, without boring the readers who have already seen it. It also shows those who are not following you on those platforms what they are missing out on. By providing them with a link demonstrating how you use that account, you are giving them more incentive to follow you and participate.

How to Link Directly to a Facebook Status:

How to find the URL for a Facebook status

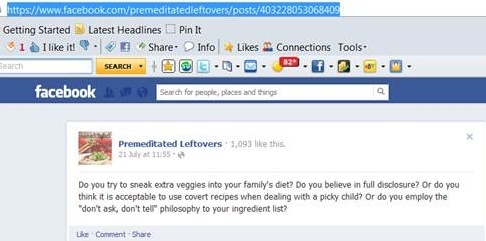
To create a link to a Facebook status, you need to find the URL (permalink) for that status.

1. Each Facebook status has a date and time stamp. You will find it right below your Facebook Page Name. In my case, below Premeditated Leftovers. It might look like 5 minutes ago, 18 hours ago, Tuesday, or 21 July. When you mouse over it, you will see the exact time and date that status was published. Click on the time stamp.

2. Once you click on the link, you will be taken to link for that status. Select and copy the URL.

3. Paste that URL into your link box to create a link. (Here is how to create an effective link)

Example using the above Facebook status as a link:

Yesterday, we had a discussion on how to get picky children to eat vegetables on my Facebook page and some of my friends pointed out that it isn’t just children who are picky. Since my husband learned to eat anything while serving in the Navy, it didn’t occur to me that spouses could be also be picky.

Although I talk a lot about key words, it really isn’t necessary to use keywords when linking to one of your social media accounts.

How to Create a Link to a Tweet:

How to find the URL for a Twitter Tweet

Creating a link to a tweet on Twitter is similar to creating a link to a Facebook status.

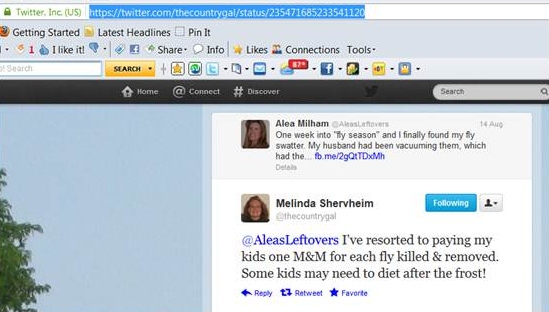
1. On the top right of your tweet, you will find a time stamp. It can look like 15s, 3m, 5h, or 14 Aug. It is directly across from your name and Twitter handle. Click on the time stamp.

2. Once you click on the link, you will be taken to link for that status. (If the tweet is part of a conversation, the tweets before and after it will also show up). Select and copy the URL.

3. Paste that URL into your link box to create a link.

Example using the above Tweet as a link:

My friend Melinda shared her method for keeping her house free of flies.

How to Create a Link to a Specific Pinterest Pin:

How to find the URL for a pinterest pin

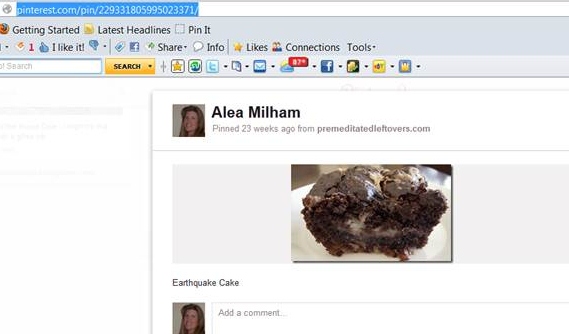
If I wanted to tell my readers that my Earthquake Cake was described as a “chocolate love bomb” on Pinterest, I could use the opportunity to send them to the pin.

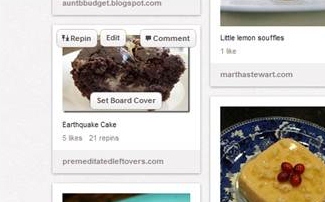
1. Ignore all the buttons surrounding the picture and click directly on the picture.

2. Once you click on the picture, you will be taken to link for that status. Select and copy the URL.

How to find the URL and create a direct link to a pin

3. Paste that URL into your link box to create a link.

Example using the above pin as a link. You don’t have to limit yourself to using these links in your blog post. I could use this link to create a Facebook status:

My Earthquake Cake was described as a “chocolate love bomb”: http://pinterest.com/pin/229331805995023371/

I know you have links to your social media on your side bar, but some readers will not recognize your link format as such, and still others have become desensitized to all the sidebar links and ignore them. Linking to your social media accounts in your blog posts can increase engagement across your various platforms. It also allows your readers to enter the conversation on a media that they feel comfortable using.

Growing a Facebook Page

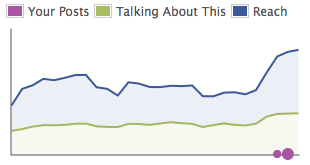
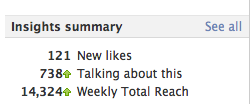
I asked my friend Beth to share how she has grown her Facebook page. I have been impressed with how she has grown her Facebook page organically, without contests and giveaways. Her authenticity is evidenced by the level of engagement on her page. I checked her stats before publishing today. Beth has 1555 likes for her page Aunt B’s Kitchen, but more importantly, she has 1027 people talking about her page. That is an amazing level of engagement! Beth isn’t just growing a Facebook page, she is growing a community.

Growing your Facebook Page and Increasing Engagement

When Alea paid me the great compliment of asking me to write a piece on how I’ve grown my Facebook page, I was both flattered and surprised. I’ve never felt that there was any great secret to what I do on my page, nor have I made any sort of formal plan for courting new “likes.”

I do know that I spend a lot of time on-line. Between writing, photographing, and promoting my blogs (there are four of them), and the time I spend interacting with readers on my Facebook page, I invest an average of 40 to 60 hours each week.

All this on-line activity is really a full-time job, and I’m very fortunate that my employer allows me to work on it during quiet times at my office. Even with that overlap, much of my “leisure” time is given to this project.

There is, for me, no fast and easy path to growing a page but I’ve come to understand that the process does break down into a few simple concepts:

Be Positive

Focus on happiness. Share things that make you smile. No one wants to listen to a Whiny Willie or a Critical Clara.

Be Polite

It should go without saying but, if a behavior annoys you on your page, it will annoy someone else if you do it on their page.

Be Present

Facebook is all about interaction. Your readers want to hear your authentic voice and to know what interests you. Share links, pictures, and posts you enjoy. Reply to comments made on your page. Comment often on posts and blogs made by other pages.

Facebook weights your posts in part upon their frequency and upon the frequency with which you “like” and comment on other posts. If you are going to absent yourself throughout the day, consider setting up timed posts, either through Facebook or through an application like Hoot Suite.

Even with timed posts, you should set aside some time both morning and evening to respond to comments, to visit other pages, and to scan through your activity log.

Be Kind

People will remember your kindness long after they’ve forgotten any posts you may have made.

Encourage people who are just starting out. Be generous in sharing links from other pages, and be generous with your praise for their work when doing so.

Listen with care to what people are saying. If they’re sharing a success or a family celebration, congratulate them. If they’re in a difficult situation, let them know that you’re sending positive thoughts their way.

Be Patient

No amount of asking or reminding will make people join the conversation on your page. It takes time for people to find you, but they will.

Have Fun

This is the most important thing of all.

Growing Your Facebook Page and Increasing Engagement without Contests


If you’re having fun and enjoying your interaction with your Facebook readers, people will sense it and want to join in too. More than any other thing, enjoying the process will help to grow your page.

Beth’s family jokes that she started writing because she just doesn’t know when to be quiet!  In truth, her blogs grew out of a long illness and helped her to keep in touch with the world around her.  Beth believes the world to be a fascinating place, providing us countless gifts and wonderful surprises every single day.  She’s interested in everything, and shares her interests at Aunt B on a Budget, A Word from Aunt B, B on Balance, and B-Attitude.